As part of the exercise to see if OpenID Connect Messages 1.0 were written appropriately so that other bindings can be produced, Jun Eijima and I have created a custom scheme binding of the OpenID Connect, and implemented it on iPhone.
In the first pass, we did it in three steps (1. Registration, 2. Authorization, 3. Userinfo request) , exactly following the Standard model. However, this proved to be a user interface nightmare. In the Standard case, the registration and userinfo request/response happens server to server without a user-agent/browser involvement. Unfortunately, this is not the case for the IdP on iPhone case. All the communication has to be through Safari. Thus, all three steps stated above would involve browser dance, which is a pretty bad user experience.
In the second incarnation, we have decided to overlay the registration and the userinfo request / response over the authorization request / response. We further decided that only request by reference is supported. This has an advantage that the client can be authenticated by the TLS session.
The binding thus became like this:
1. Prepare a request parameter file
Request Object will look like:
{
        "response_type": "token id_token userinfo",
        "client_id": "https://example.com/",
        "scope": "openid profile",
	"userinfo":{
		"claims":{
			"email":null,
			"name":null,
			"picture":null
		}
	},
	"registration":{
		"claims":{
        		"type":"client_association",
        		"contacts":"contact@example.com",
        		"application_name":"Sample RP",
        		"logo_url":"https://example.com/rp/logo.png",
        		"policy_url":"https://example.com/rp/policy.html",
        		"redirect_uris":"httsp://example.com/rp/authz/callback.php"
		}
	}
}
This is then captured into a file with a URL https://example.com/rp/rpf.json
Note that the client_id is not something the IdP gives out to the client, in this case. Instead, it is the fully qualified URL.
2. Make an authorization request
Next step is to make the authorization request.
It is a straight forward “request by reference” except that it uses custome scheme “openid://” instead of normal https://.
Typically, the user arrives at the web site and clicks [Login] button, which is linked to something like:
openid://authz?request_uri=https://example.com/rp/rpf.json&state=a_f2fkEx&nonce=4f8921ce98f89


3. IdP fetches the request file
When the IdP on iPhone is invoked through the custom scheme as in section 2., the IdP obtains the URL of the request file and fetches it.
When doing so, the IdP should check the SSL certificate’s CN to the client_id.
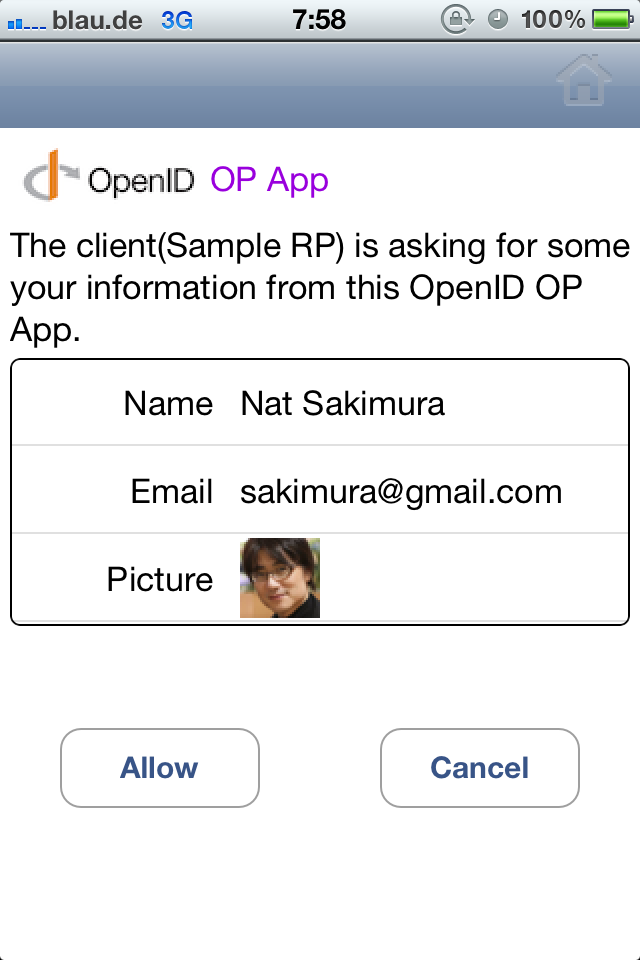
4. User Authorizes
Assuming that the iPhone has a password lock, we can skip the authentication. (If you want, you can set a pin in the IdP application as well.) Thus, the user is shown the authorization dialogue.

5. Response Returned
Once obtained the user authorization, the IdP returns the response in the fragment to the return_uri. The fragment has userinfo token in addition to usual access token and ID token. The page at the return_uri then obtains the fragment, typically by using javascript, and send it back to the client web server for further processing.
In the fragment are three tokens in this case:
- access_token : Normal OAuth 2.0 access token.
- id_token: JWS signed OpenID Connect ID Token. Public key corresponding to the signing key is found in iss & user_id member.
- iss: Issuer of this token. Unlike the normal case where it is a URL, in this self issued IdP, it is the public key of the key pair that was generated for the client.
- user_id: Same as iss. Thus, if iss==user_id, the client can identify that it is a self issued IdP.
- nonce: defined in Messages.
- exp: ditto
- iat: ditto
- …
- userinfo_token: JWT that include the userinfo JSON as the body.
Then the web server inspects id_token, and logs the user in.

6. Advantages and Issues of IdP on a smartphone
There are several advantages that IdP on a smartphone has.
- Only YOU know where you went: Unlike when using a third party IdP, only you know where you visited.
- In the phone authentication: An App inside the phone can authenticate against IdP on the phone. No network connection is needed for this.
On the other hand, there are short comings as well.
- The RP has no way of knowing if the IdP on the smart phone is installed and configured.
If there is a good way to deal with this problem, please let me know.
Perhaps I am missing something basic here, but… the idea of the IdP and the client being one and the same seems to sidestep the foundational principle that the RP can trust the IdP as an impartial third party. If you are authenticating yourself and making claims about yourself and the authenticating party is also under your control then there is a serious segregation of duties issue. How is the RP to trust the IdP on every phone?
like i said – perhaps I missed something here…
thanks
derek
it depends on the use case you are talking about.
In many cases, only the fact that the same user (who has paid) is returning is needed. That is pseudonymity. In fact, for most commercial transaction, that is what is needed. It is not me saying. I had a committee of financial institutions, internet commerce companies etc. a couple of years ago discussing this issue for half a year, and this was their conclusion. For this, self-issued IdP is perfectly adequate. In fact, it is much more secure than password in the case of IdP on the phone, so it is potentially more desirable. Think of this: when you walk into a store, do you need impartial third party to accompany you? No. Requiring impartial third party is a “distrust by default system” and is non-starter.
For the claims other than authentication context, the authoritative source for the claim differs from a claim to another. For example, while your age may be verified by the birth registry or something like that, you are perfectly good authority for the address that the goods you bought needs to be delivered. So, there is no single authority for your attributes.
When you need a third party attested claims, you can get the signed claims and store it in the Phone IdP (claims aggregation) as well as providing the reference to the source (distributed claims). That is the beauty of the OpenID Connect protocol.
Nice! A couple thoughts come to mind…
1. When using my phone I want the choice of whether to use the local IdP or a remote one. For instance, I might want to log into some site with my Google credentials because activity can then be easily posted to G+
2. It would be very cool, if I could use the IdP on my smart phone when surfing the web on my laptop:) Not sure how to register that IdP as an OpenID Connect endpoint the website can reference.
A.1 That’s easy. If something like Account chooser supports phone IdP in parallel to the normal IdPs, that is done.
A.2 This is more challenging. It is the session transfer between the PC browser and the phone. Some of the ways that we have been experimenting is to use QR code, Bluetooth, WiFi, and 6 digits code. Need more time to figure it out.